
Setting up your Microsoft 365 Graph environment
- What is Microsoft 365 Graph and why should you care?
- Setting up your Microsoft 365 Graph environment (this post)
Welcome back to our Microsoft Graph developer series for beginners! In our last post, we introduced you to Microsoft Graph and explained why it’s such a powerful tool for developers. Today, we’ll be diving deeper into the specifics of setting up your Microsoft 365 Graph environment.
Before we get started, let’s quickly recap what Microsoft Graph is. As we mentioned before, it’s a platform that allows you to access data and insights across multiple Microsoft services through a single API. This means that with just a few lines of code, you can create applications that integrate with Microsoft 365 services like SharePoint, OneDrive, and Teams, among others.
If you want to play around with Microsoft 365 Graph you need some environment and data to play with. The first thing you’ll need to do is create a Microsoft 365 developer account. You can do this by going to the Microsoft 365 Developer Program website and signing up for a free account. Once you’ve created your account, you’ll need to create a Microsoft 365 developer subscription. This will provision a dedicated Microsoft 365 environment with 25 E5 user licenses. You can also install sample data pack to your subscription to play with some sample data.
With the developer subcription in place we are going to perform a couple of queries against our environment without the need of setting up applications. The easiest way to test Microsoft Graph is by using Graph Explorer. The Graph Explorer is an Azure AD application that was created by the Graph team to allow developers to test and experiment with the Microsoft Graph API. With the Graph Explorer, you can easily query the Microsoft Graph and retrieve data from a wide variety of sources, including Azure AD, Office 365, and other Microsoft services.
To get started with the Graph Explorer, you’ll need to log in using the admin credentials for your developer tenant. Once you’re signed in, you can begin exploring the Microsoft Graph API by entering queries in the search box at the top of the screen. The Graph Explorer is structured around a central console where you can write and execute queries, view the API response, and see the HTTP request and response headers. The console is split into three main sections: the query editor, the response panel, and the header panel. The query editor allows you to write and execute Graph API queries using the OData query language. The response panel shows the JSON response from the API, while the header panel displays the HTTP headers of the request and response.
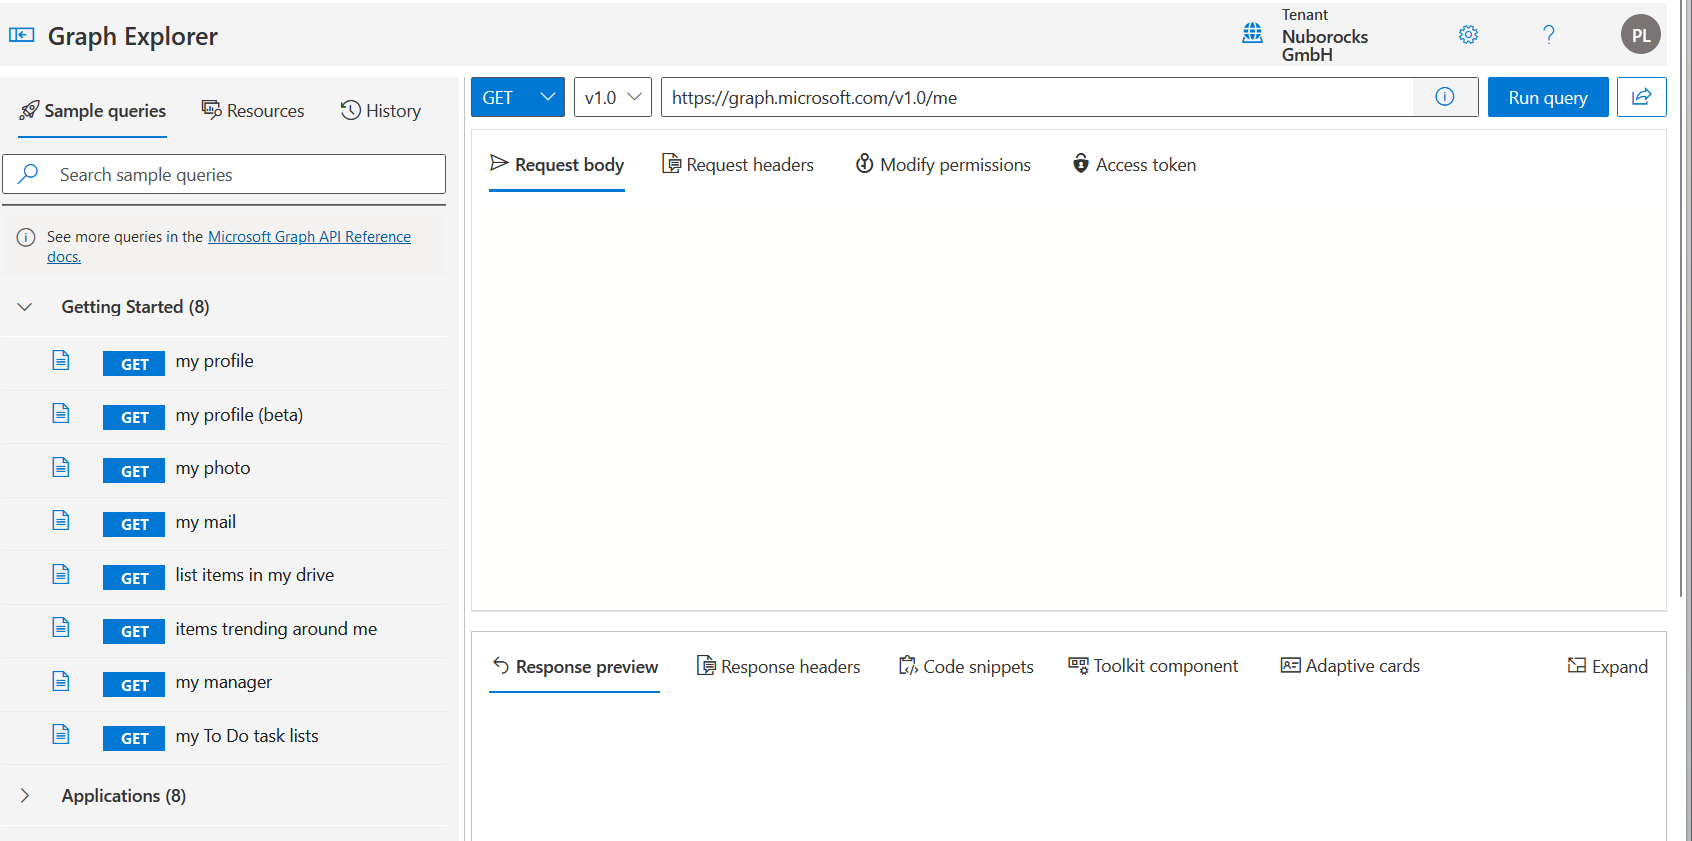
The first query in the Graph Explorer, https://graph.microsoft.com/v1.0/me, retrieves the user profile information of the signed-in user. The “me” keyword is a shortcut for the currently authenticated user. This query returns a JSON object that includes the user’s display name, email address, job title, and other properties. All queries executed in Graph explorer are running in the context of the signed in user.
The documentation for Microsoft Graph is available on the Microsoft Graph website at https://docs.microsoft.com/en-us/graph/. This website provides comprehensive information on how to use the API, including tutorials, reference documentation, and code samples.
The documentation is organized by service, endpoint, and version, making it easy to navigate and find the information you need. Each endpoint specifies the permissions required to execute each call. When using Graph Explorer, it’s crucial to ensure that the app has the necessary permissions to perform the operation. You can manage this by accessing the “Consent to permission” menu under your profile settings. Note that for some permissions, only administrators can consent to them. Fortunately, as a Global Administrator of your developer subscription, you have the necessary permissions to manage app permissions effectively.
Microsoft Graph has two versions: v1.0 and beta. The version is the stable release of Microsoft Graph and is generally available for production use. It provides a set of features and functionality that are fully supported and documented. The v1.0 version also has long-term support and guarantees backward compatibility, meaning that any changes to the API are made in a backward-compatible manner.
The beta version, on the other hand, is a preview release of the Microsoft Graph API that provides access to new and upcoming features. It is intended for developers to test and provide feedback on new functionality before it is released to the stable version. The beta version may have breaking changes or may be removed without warning, making it unsuitable for production use.
If you want to explore new endpoints in Graph you usually follow 5 basic steps:
- Step 1: Explore the endpoints using the Graph documentation: When starting to use a new Graph endpoint, it’s important to first explore the endpoint and understand its capabilities. The Microsoft Graph documentation provides a comprehensive list of all available endpoints along with their parameters and expected results. For example, to access the endpoint that lists all users, you can follow this link to the Microsoft Graph documentation
- Step 2: Identify if the feature is in Beta or v1.0: Microsoft Graph offers both beta and v1.0 endpoints. Beta endpoints are in the preview phase and may not have all features and functionalities fully developed yet. On the other hand, v1.0 endpoints are more stable and offer full functionality. Before using an endpoint, make sure to check whether it is in beta or v1.0, and choose the one that is most appropriate for your needs.
- Step 3: Verify the permission requirements of the endpoint: Each Graph endpoint has its own set of permission requirements, which determine which applications and users can access the endpoint. Make sure to check the documentation to see if you have the necessary permissions to use the endpoint.
- Step 4: Grant consent to Graph Explorer for the required permissions: If the endpoint requires additional permissions, you will need to grant consent to Graph Explorer to access those permissions. You can do this by clicking on the “Consent to permission” menu under your profile settings.
- Step 5: Run the query: Once you have explored the endpoint, verified its permission requirements, and granted consent, you can run the query in Graph Explorer by entering the endpoint URL in the “Query” box and clicking on the “Run query” button. The results of the query will be displayed in the “Response” box, and you can use this information to further develop your application or explore additional endpoints.
Congratulations! You’ve made it to the end of this blog post, and hopefully you’ve learned a lot how to get started with the Graph Explorer. But don’t stop there! There’s no better way to put your newfound knowledge into practice than by playing around with the Graph Explorer. With your developer subscription, you can test Microsoft Graph to your heart’s content and see just how powerful it can be.
So go ahead, explore the Graph Explorer, experiment with the different APIs, and see what you can accomplish. You might be surprised at how much you can do with just a few lines of code.
- What is Microsoft 365 Graph and why should you care?
- Setting up your Microsoft 365 Graph environment (this post)