
Create a custom connector with an OpenAPI definition (aka Swagger) from an ASP.NET Core solution
- How do I create a custom connector for Microsoft Flow and PowerApps?
- Create a custom connector that accesses an anonymous REST API
- Create a custom connector with an OpenAPI definition (aka Swagger) from an ASP.NET Core solution (this post)
You can download the source code for this series directly from my GitHub repository. The name of this sample project is 02. CustomConnectorSwagger.
While in the previous posts you learned how to define a custom connector from scratch, this post will show you how you can leverage an OpenAPI definition coming from your ASP.NET Core REST application to create a custom connector.
The OpenAPI Specification (formerly Swagger Specification) is an API description format for REST APIs. In this file, you can describe your entire API, including the endpoints, operations, input-output for each operation, and authentication methods. You can find more information about this specification here.
When creating a new custom connector for Power Automation, you can upload an OpenAPI specification of your endpoints to speed-up the creation process for your flow.
How to get started?
I created a project on GitHub that can be used to explore these capabilities and benefits. This project shows you how you can describe each action with OpenAPI keywords using Swashbuckle. To get everything up-and-running, follow these steps:
- Get the project 02. CustomConnectorWithSwagger from the GitHub repository.
- Publish the 02. CustomConnectorWithSwagger project to Azure AD or some other hosting provider. Find here the guide how Azure Web Application publishing works.
- Once we published the project for the first time, we have to get the host URL of the web application. You can test if the API returns some values by calling the address [PutYourHostAddressHere]/api/products in your browser. You should get back some results. If not, ensure that you got the correct host and that you published your project.
- Change the appsettings.json file and add the host parameter. You should put the host address of the published web application. Publish the web application again after you performed this change.
Let us explore the project
The generation of the Swagger file is performed by the Swashbuckle libraries. The NuGet packages used for the ASP.NET Core Web Application are:
- Swashbuckle.AspNetCore: Swagger tools for documenting APIs built on ASP.NET Core
- Swashbuckle.AspNetCore.Annotations: Provides custom attributes that can be applied to controllers, actions and models to enrich the generated Swagger
Enable the Swashbuckle component
Adding the NuGet packages is not enough. We have to enable Swashbuckle using dependency injection in our Startup.cs class. The lines of code below perform this activity.
1
2
3
4
5
6
7
8
9
10
11
12
public void ConfigureServices(IServiceCollection services)
{
    services.Configure<SwaggerSettings>(Configuration.GetSection("SwaggerSettings"));
    ...

    services.AddSwaggerGen(c =>
    {
        c.SwaggerDoc("v1", new OpenApiInfo { Title = _swaggerApiName, Version = "v1" });
        c.DocumentFilter<BasePathDocumentFilter>();
        c.EnableAnnotations();
    });
}
The lines getting the SwaggerSettings and adding the DocumentFilter are just required to fill the required host value in the Swagger file. This host value is used by the custom connector to specify the host of the REST service. You can configure the value of the host under appsettings.json.
The next lines of code are finalizing the configuration for our Swagger file generation.
1
2
3
4
5
6
7
8
9
10
11
12
13
public void Configure(IApplicationBuilder app, IHostingEnvironment env)
{
    app.UseSwagger(c =>
    {
        c.SerializeAsV2 = true;
    });
    app.UseSwaggerUI(c =>
    {
        c.SwaggerEndpoint("/swagger/v1/swagger.json", _swaggerApiName);
    });

    ...
}
These will tell Swashbuckle to generate a SwaggerUI allowing you to browse the documentation and interact with the app. You can reach it over the URL [PutYourHostAddressHere]/swagger.
The Swagger file is generated under [PutYourHostAddressHere]/v1/swagger.json. Note that we are outputting a Swagger v2 file. Custom connectors do not support other Swagger definitions right now even if the current version is v3. Microsoft is going to provide support for higher versions in the future.
Optional: add descriptions to your endpoints
If you open the ProductsControllercs you will see some attribute definitions that are used to add the descriptions for the actions used in your custom connector. If you do not do this, you have to specify them manually in the Define section of the custom connector creation.
1
2
3
4
5
6
[HttpGet(Name = "GetProducts")]
[SwaggerOperation(Summary = "Get products", Description = "Return all products", OperationId = "GetProducts")]
public ActionResult<IEnumerable<Product>> Get()
{
    return _repository.Get();
}
Let’s create the custom connector using the OpenAPI definition
You can download the Swagger file from [YourAzureHostAddress]/swagger/v1/swagger.json. This file is required during the custom connector creation.
Login to your Power Automation interface and choose the Custom Connectors option in the menu.
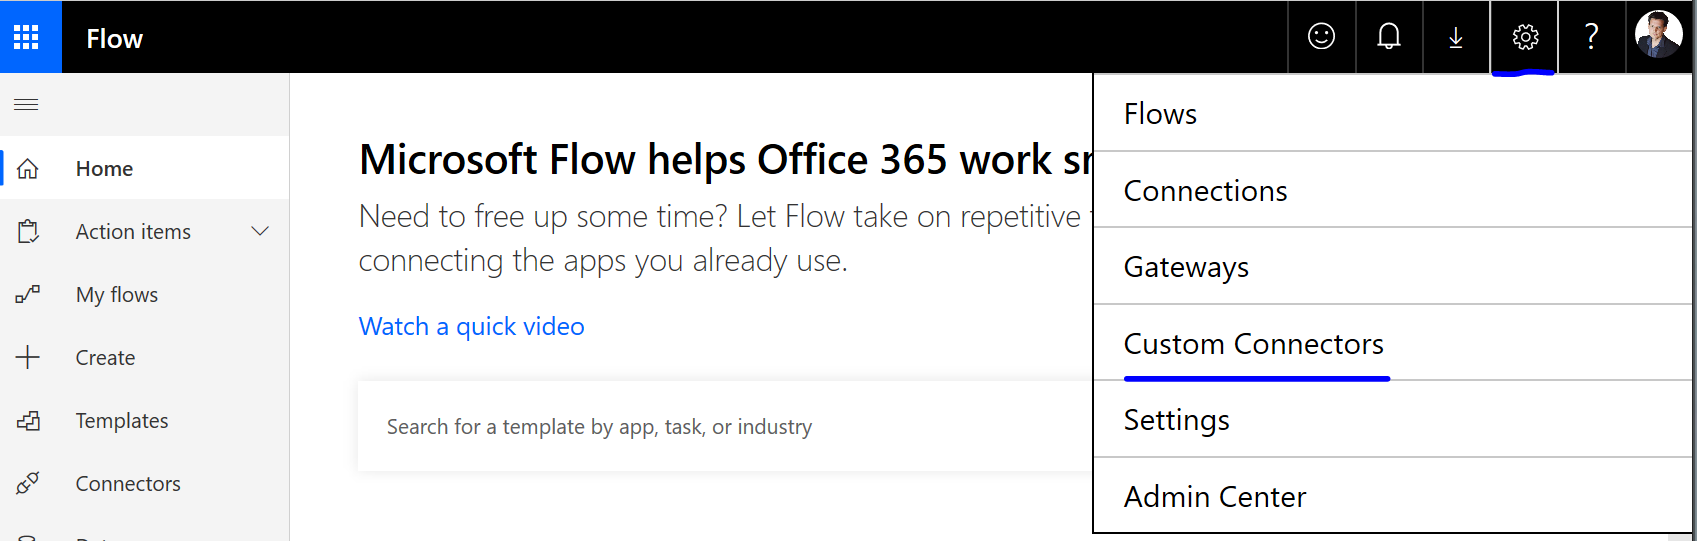
You will be redirected to the custom connector overview page managed by you. The creation of a new custom connector is performed using the New custom connector option. Chose the New custom connector -> Import an OpenAPI file, specify the name for your connector and the Swagger file you downloaded before.
You will be redirected to the next interface. All important values are already filled out from the swagger file.
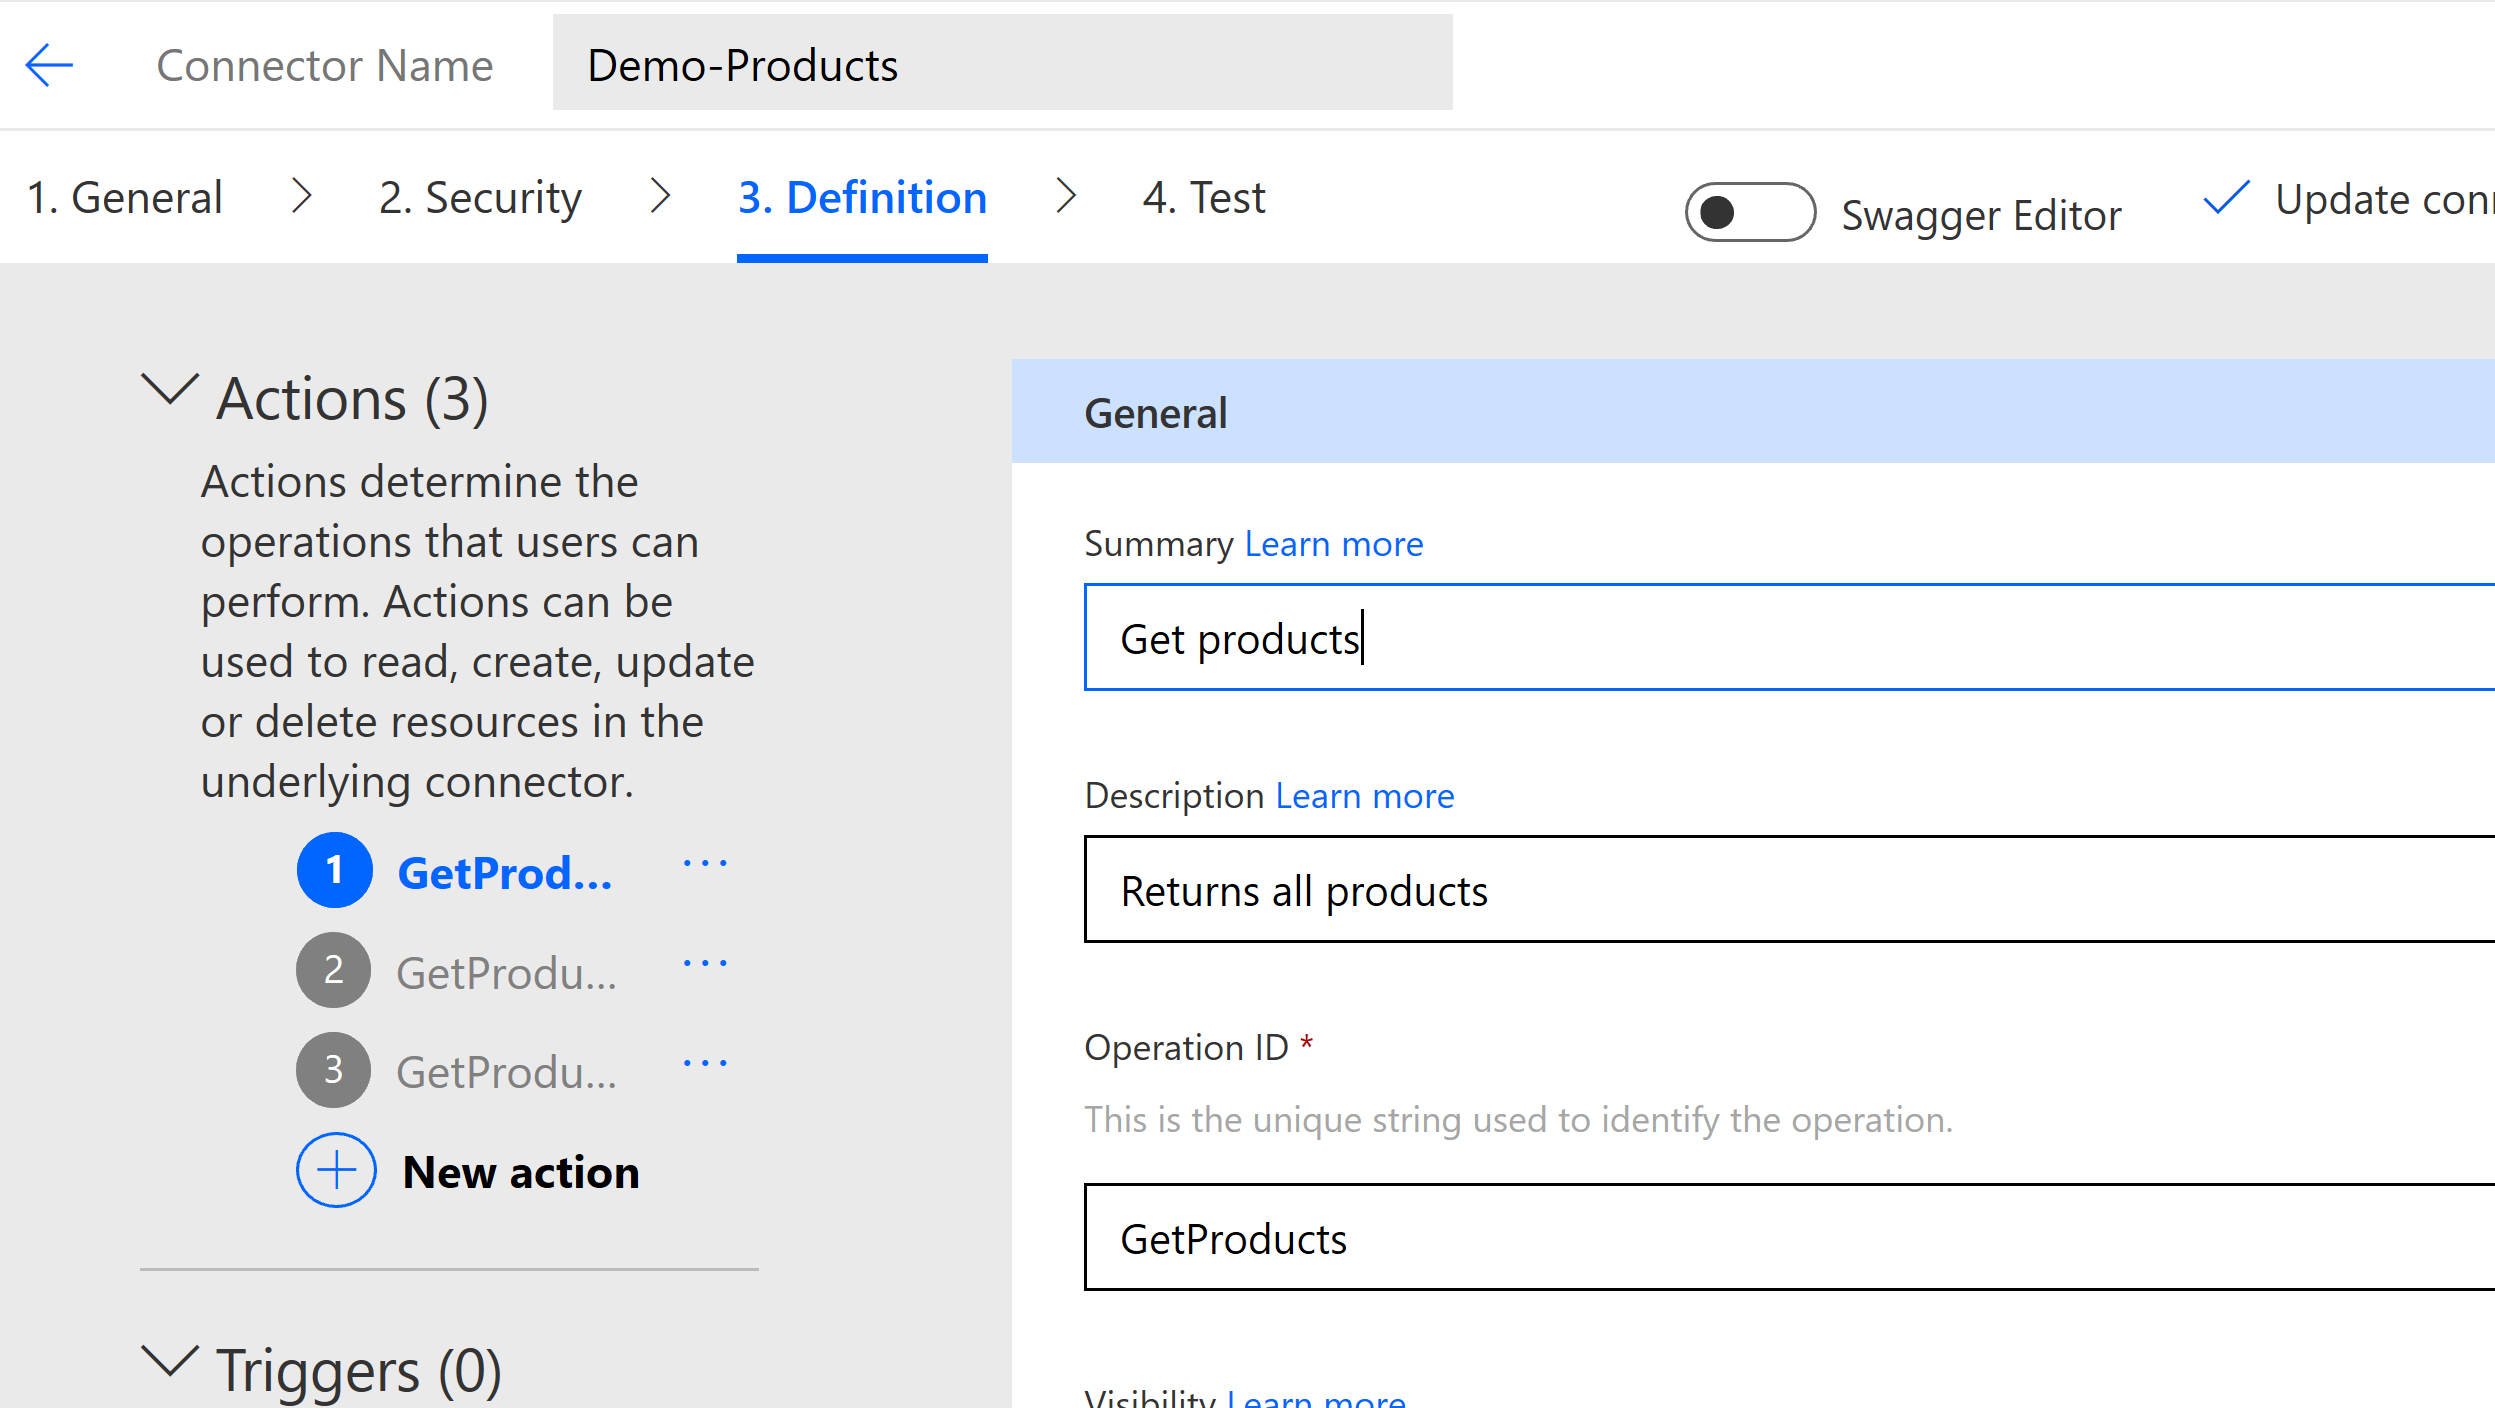
You can further change the definition if required and the save the connector. The rest works the same as described in the previous post.
Conclusion
In this post we saw that you can leverage the OpenAPI definition of your REST APIs to create a custom connector in Power Automation. This approach will not only improve the documentation for your endpoints, it also speeds up the creation of the custom connectors.
- How do I create a custom connector for Microsoft Flow and PowerApps?
- Create a custom connector that accesses an anonymous REST API
- Create a custom connector with an OpenAPI definition (aka Swagger) from an ASP.NET Core solution (this post)